The '92 March 2005
Jackson Racing Supercharger
I like it!

The '92 March 2005
Jackson Racing Supercharger
I like it!
6-20-2004 -- 8 psi Upgrade News
|
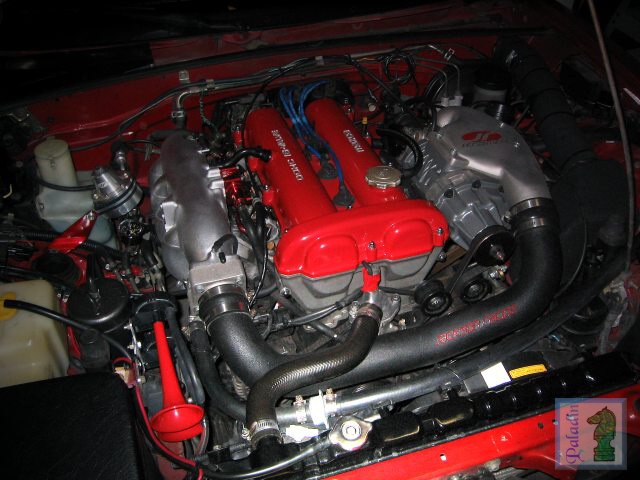
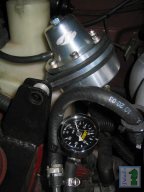
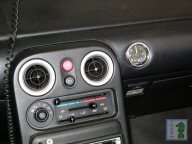
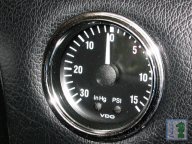
I need to start by saying I've never been a fan of aftermarket turbochargers for everyday driving. I know there are many out there who would willingly and with great zeal argue that when properly configured an add-on turbo can be just as tractable as a supercharger--however my observations have been that dollar for dollar and with modest boost levels (up to 8 psi or so) superchargers are much more dependable and provide a much more seamless power increase--so, armed with a chunk of cash that crept into my life somewhat unexpectedly I ordered (from ImportParts.com -- $2,155 in March '04, $2,275 now) a Jackson Racing Supercharger kit for my '90 Miata. The kit arrived a week later on a Thursday and hardly able to contain myself (having to work for a living had some influence on this) I waited 'til Saturday to install the puppy. The installation was straightforward, and with the exception of a few remnants of instructions from earlier versions, and rather poor illustrations the JR Installation instructions were good. I didn't photograph or otherwise document the installation for two reasons: 1) because other's have done it; and 2) because I used 1) to rationalize my decision to not document the project which got me on the road faster -- sorry 'bout that, but there it is... It's also not particularly difficult, time consuming mostly--it took me 5-1/2 hours including 10 minutes or so to stuff a sandwich in my face and 40 minutes or so to remove my heater core bypass mod (the heater core is just bypassed for now). Come Fall I'll install the OEM hoses and that will give me 'til next spring to figure out what to do to make shutting down the heater core easier than swapping hoses twice a year. The photos below show the bare supercharger (1. just about the prettiest thing I've ever seen), my use of the mounting bracket from an eBay "el-cheapo" shock tower brace to mount the AFPR (2. Auxiliary Fuel Pressure Regulator), and the VDO vacuum/boost gauge (3. and 4.) I installed in the padded part of the dash to the right of the eyeball vents. |
|||
2. (click for a larger image) |
3. (click for a larger image) |
4. (click for a larger image) |
|
| Picture 2. also shows the Jeg's fuel pressure gauge I permanently installed to make setting the AFPR less hassle. This is a nifty little gauge for $20, it is liquid filled so you don't have to worry (as much) about it shaking itself to death and squirting fuel all over your engine compartment, and it relatively accurate--I find that the one I received reads about 2psi low at 50psi, that's not too bad for an inexpensive gauge. | |||
5.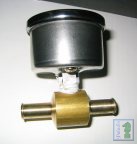 (click for a larger image) |
6.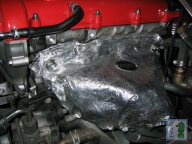 (click for a larger image) |
7.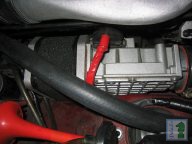 (click for a larger image) |
8.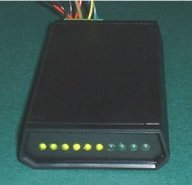 (click for more information) |
|
Photo 5. shows the Jeg's fuel
pressure gauge and the brass "T" fitting I made. The T fitting has
5/16" hose barbs to fit the Miata fuel line, and a 1/8" NPT female side
tap for the gauge. Photo 6. shows the Track Dog Racing heat shield installed over my OBX "ceramic coated" header. I highly recommend this product, at $90 it seems pricey however the materials from which it is made are expensive purchased alone and the workmanship is impeccable. I had just spent $2200 for the supercharger, $90 more to protect it and the AFM from the radiant heat generated by the header was a "no brainer" for me. Photo 7. shows the stock AFM nestled down between the supercharger and the shock tower. It fit's down into there like it was made to be there. Photo 8. shows the Bipes ACU (Auxiliary Control Unit) -- this remarkable and relatively inexpensive ($210) device provides control of the ignition timing so as to retard the spark under boost and thus prevent your engine from self-destructing from pre-ignition/detonation. Click on the picture or the hotlink above for more information. The Bipes ACU can be purchased from BR Performance. NOTE: Do NOT order this product (or anything) from RoadsterPerformance.com. Despite the fact that their website continues to be operational, they are OUT OF BUSINESS and will charge your credit card and thereafter never communicate with you or deliver any product. This has been going on for nearly a year, I can only assume that "Scott" is some well-connected local Bubba in Oxford NC as anyone else would be thrown in jail for running such a scam. For those interested, I am running 14° BTDC base timing with the Bipes programmed to pull 5° at maximum airflow, using the 3K--4K RPM map (start retard at 3,000 RPM, maximum retard at 4,000 RPM), and to add 1° retard for every 50°F. This is after 3 weeks of playing with various settings. I am running 93 Octane pump gas which fortunately we can get anywhere here in the Sunshine State. Well, that's about
it for the JRSC other than for me to say that it represents without a
doubt the best $2600 I've ever spent on my Miata. My only regret is
that I didn't realise that 1-1/2 years ago when I first got the car--I
would have found a way to get the money! |
|||
12. (click for a larger image) |
|||
|
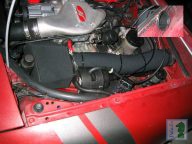
Update--6/20/2004: I was able to obtain a 67.5 mm supercharger pulley (photo 9., the "stock" pulley for the 1.8L JRSC) which has increased my boost to a solid 8 psi. This also called for more fuel then the Walbro GSS250 (190 lph @ 40 psi, 90 psi max) fuel pump I installed with the SC could deliver, so I installed a Walbro GSS342 (255 lph/130 psi pump). Along with this I had to bump the AFPR base setting (with the vacuum/boost line disconnected) to 65 psi, which makes my peak fuel pressure at 9 psi boost 100 psi--I have replaced all fuel lines with Goodyear SAE J30R9 hose, this stuff is rated for 135 psi working pressure and a 900 psi bursting strength. So far all is well even though f/p at idle is around 42 psi the stock ECU can deal with it in closed loop mode (the 4-wire O2 sensor is an essential thing now). My gas mileage is down to 25.5 MPG but there are no real signs of over rich operation. I've got a set of 1.8L injectors (230 cc vs. 205 cc for the OEM units) sitting on the workbench that will be going in this weekend. Update--6/27/2004: The Bipes ACU can display intake air temperature, as measured by a thermistor in the AFM. It does this by using the 10 LEDs on it's front panel to display 0°F to 200°F, I.e. 20°F for each illuminated LED. I found that in the HOT weather we are now experiencing (95°F+ every afternoon) my intake temps were rising to 180°F to 200°F with the headlights closed--opening the lights while under way at any speed over 30 MPH would cause intake temperatures to drop by 40°F to 80°F, to as low as 120°F at 75 MPH. This got me thinking about one of those "lazy eye" kits, or some sort of cold air intake setup. I decided on the latter and set out to fabricate an airbox (photo 10.) for the JRSC air filter (photo 7.), and to connect same to a hole in the cowl via a 2-1/2" ID duct from JC Whitney (photo 11.). The air box is made of 0.040" aluminum sheet, pop-riveted, the whole thing is insulated with 4 mm wetsuit material. To make the box I custom fitted cardboard templates for the fore and aft endplates, and then connected them with uneven trapezoid panels--you can see this construction in photo 10. The hole in the cowl was cut using a 2-1/2" Starrett holesaw, the intake horn came from a stock Honda Civic intake, abandoned by its former owner. The assembly works better than I had hoped, I can maintain 120°F intake temperatures (with the headlights closed) at any speed over 30 MPH; and as a side benefit the intake noise is somewhat reduced. Update--7/11/2004: Well, I missed a weekend building the cowl intake, however I did put the 1.8L injectors (230 cc) in yesterday, drove about 5 miles and put the 1.6L units (205 cc) back in. With the 1.8 injectors the idle was horrible, surging and drooping, the engine ran rich at all throttle settings except deceleration, and during transition from vacuum to boost there was a big fat lean spot. I played with the AFPR, even dropping the base pressure to as low as it would go (42 psi).
I thought of putting the Walbro GSS-250 back in (the
GSS-342 does overwhelm the OEM pressure regulator) however is was HOT and
I knew that reinstalling the 1.6 injectors would get me back to where I
was--so that's what I did. The exercise wasn't a total loss, as I
did get things cleaned up nicely and installed new O-rings and grommets on
the injectors. |
|||
Return/Goto My Miata Home Page
Persian mythology gave the name Ahura Mazda
to the god of light...
cliffyk@paladinmicro.com